Monday, 27 July 2015

Increase file upload limit in Sharepoint 2007/2010/2013 Document library list


                 When  you are trying to upload files into sharepoint document library list, it crash down because you exceeds the file size limit. You may encounter the following error messages
  • "An unexpected error has occurred"
  • "The page cannot be displayed”
  • "An unknown error occurred"
  • "HTTP 404 – Page Not Found”
  • “Request timed Out’


Solution for  the above issues are

1.    Increase the Sharepoint site file upload limit through Central administration.
    Steps are
   a. Open central admin
   b. Open Application Management Tab


   c. Select Web application general Settings
   d. Change the Maximum Upload  value with the desired value in MB( e.g 250)

   e. Ok

Now the sharepoint site is ready for accepting the desired file size.

2.   Increase the IIS connection time out length

      If you not increase the IIS connection timeout, there is a chance of connection time out of site when you are trying to upload bigger files into your Document Library . The standard time out value is 120. You can change it as the max time out value ie 6600
     Steps are
   a. Open IIS 
   b. Select Sites
   c.  Right click the sharepoint site open advanced Settings


    On Advanced Settings Tab under connection Limits change the Connection time out (Seconds) value. For setting maximum time out value enter 6600.

3. Add  httpRuntime Execution time-out in the web application- web.config file.
   Browse to the web application's virtual directory and edit the web.config file
         C:\inetpub\wwwroot\wss\VirtualDirectories\

 <httpRuntime executionTimeout="1048576" maxRequestLength="216000" />

Increase the IIS request length to maximum level. ie increase the maxAllowedcontentlength

Ru this command on the machine you are running the IIS

%windir%\system32\inetsrv\appcmd set config -section:requestFiltering -requestLimits.maxAllowedContentLength:209715200 

These are the all settings you need to set for increasing the file upload limit in Sharepoint Document Library

Thursday, 23 July 2015

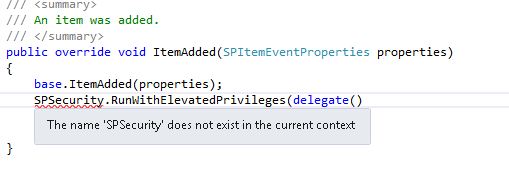
The Name 'SpSecurity' Does Not Exist In the current context in Sharepoint 2013

   In some cases the SPSecurity name does not  exist in the current context either in Event Handler  r webpart. That is because of  SPSecurity class is not available in sandboxed solutions. It is available in farm solutions.

When you deployed a event handler as sandboxed solution you will see an error that " The name SPsecurity doesnot exist in the current context."


                   So if you deploy the event handler as a farm solution SHAREPOINT you will see that SPSecurity class is available in the current context.


Thursday, 26 June 2014

Add Visual Studio2008 Command Prompt

  • Open Visual Studio
  • Go To "Menubar -->  Tools -->  External Tools
  • Click "Add"
  • Enter Information:

    Title:
     Visual Studio 2008 Command Prompt
    Command: cmd.exe
    Arguments: %comspec% /k ""C:\Program Files\Microsoft Visual Studio 9.0\VC\vcvarsall.bat"" x86
  • Click "Ok" and you are done.
Refer This Link
http://www.c-sharpcorner.com/uploadfile/rmcochran/running-the-command-prompt-from-visual-studio-tools-menu/


For 

cannot be opened because its project type (.csproj) is not supported by this version of the application.


Go to Start> All Programs > Visual Studio 2008 > Visual Studio Tools > Click Visual Studio 2008 Command Prompt. Type the below command and press enter.
devenv.exe /resetskippkgs
It opens Visual Studio 2008 IDE and finally everything was OK .

Refer this Link
http://anandranjanp.blogspot.in/2010/01/cannot-be-opened-because-its-project.html

Monday, 6 January 2014

Event Handlers to create subsites when items adding into Lists: Sharepoint(2007/2010)

These are the simple steps to create an event handler to create subsites when we add items into a lists.

For this first we need to create a teamsite in sharepoint. For that
Click the site action link on the right top side of your sharepoint site and select create then select Sites and Work spaces under Web pages pane.
 Then save this site as template by clicking Save site as template on Look and feel pane.
the we are re directing to a new page. On this page write the template name and file name

Then add a custom list on your share point site and set the Columns Title,Description,SiteUrl
Set the SiteUrl column type as HyperLink.

Create The Event Handler

     Next step is to create the Event Handler. For this open your Visual Studio 2010
Select File>New>Project
On Project types Select WSP builder and then select WSP Builder project template
Type the project Name as ListEvents. 
Then  right click the ListEvents Project and add new Item then select Event Handler Templates from WSPBuilder and write the name.
Here I put MyEventHandler as name.
Select MyEventHandler.cs file and put these codes in ItemAdding event

public override void ItemAdding(SPItemEventProperties properties)
        {
            base.ItemAdding(properties);
            SPWeb spCurrentSite = properties.OpenWeb();
            string curListName = properties.ListTitle;
            if (curListName == "SubSites")//My list Name
            {
                SPListItem curItem = properties.ListItem;
                string curItemSiteName = properties.AfterProperties["Title"].ToString(); //Column name in List
//Column name in List
                string curItemDescription = properties.AfterProperties["Description"].ToString();

//Column name in List
                properties.AfterProperties["SiteUrl"] = spCurrentSite.Url + "/" + curItemSiteName;
              
                SPWeb rootWeb = spCurrentSite.Site.RootWeb;
                SPWebTemplateCollection webTemplates = rootWeb.GetAvailableWebTemplates(1033);
               
                string webTemplateName = "MyTemplate";//Template name
                string webTemplateSearchName = "";
//List all the templates and select our template
                for (int i = 0; i < webTemplates.Count; i++)
                {
                    webTemplateSearchName = webTemplates[i].Name.ToString();
                    if (webTemplateSearchName.Contains(webTemplateName))
                    {
                        webTemplate = webTemplates[webTemplateSearchName];
                        break;
                    }
                }

                SPWeb newSite = spCurrentSite.Webs.Add(curItemSiteName, curItemSiteName, curItemDescription, Convert.ToUInt16(1033), webTemplate, false, false);
                newSite.Navigation.UseShared = true;
                newSite.Close();

            }

Save this code.
Then on elements.XML file add this code
  <Receiver>
      <Name>AddingEventHandler</Name>
      <Type>ItemAdding</Type>
      <SequenceNumber>10000</SequenceNumber>
      <Assembly>ListEvents, Version=1.0.0.0, Culture=neutral, PublicKeyToken=17cc11051bd641bb</Assembly>
      <Class>ListEvents.MyEventHandler</Class>
      <Data></Data>
      <Filter></Filter>
    </Receiver>
  </Receivers>

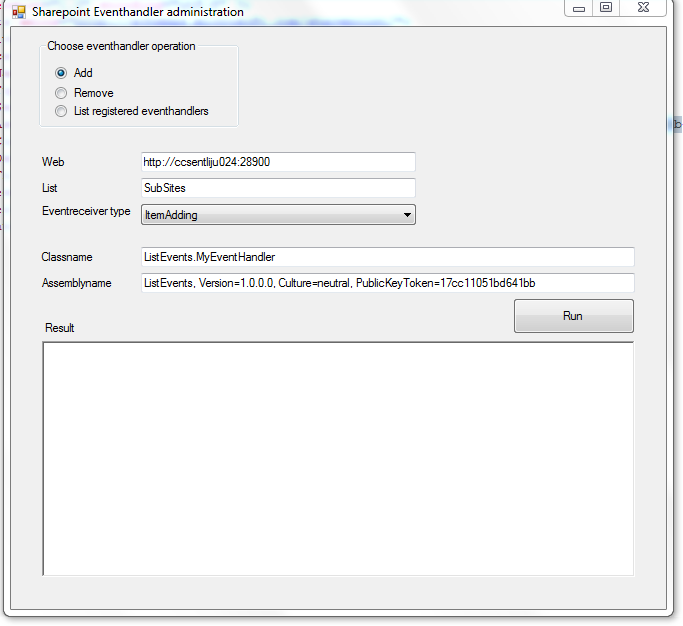
Or you can add this event on sharepoint site using
Eventhandler administration.exe.


Right click the ListEvents project Build WSP on WSPBuilder.
Then Deploy the project.
Then in your site SiteActions>SiteAdministration>SiteFeatures
Active your MyEventHandler


Then add items into your List the event will work.. :)